How to Use a Body Repair Kit for Your Car: A Step-by-Step Guide
Maintaining your car’s appearance isn’t just about aesthetics—it’s also about preserving its value and integrity. Whether you’ve got a minor dent, a deep scratch, or a small fender bender, a car body repair kit can help you fix these imperfections quickly and affordably. In this blog, we’ll walk you through the process of using a body repair kit effectively, so you can restore your vehicle’s smooth finish with confidence.
What Is a Car Body Repair Kit?
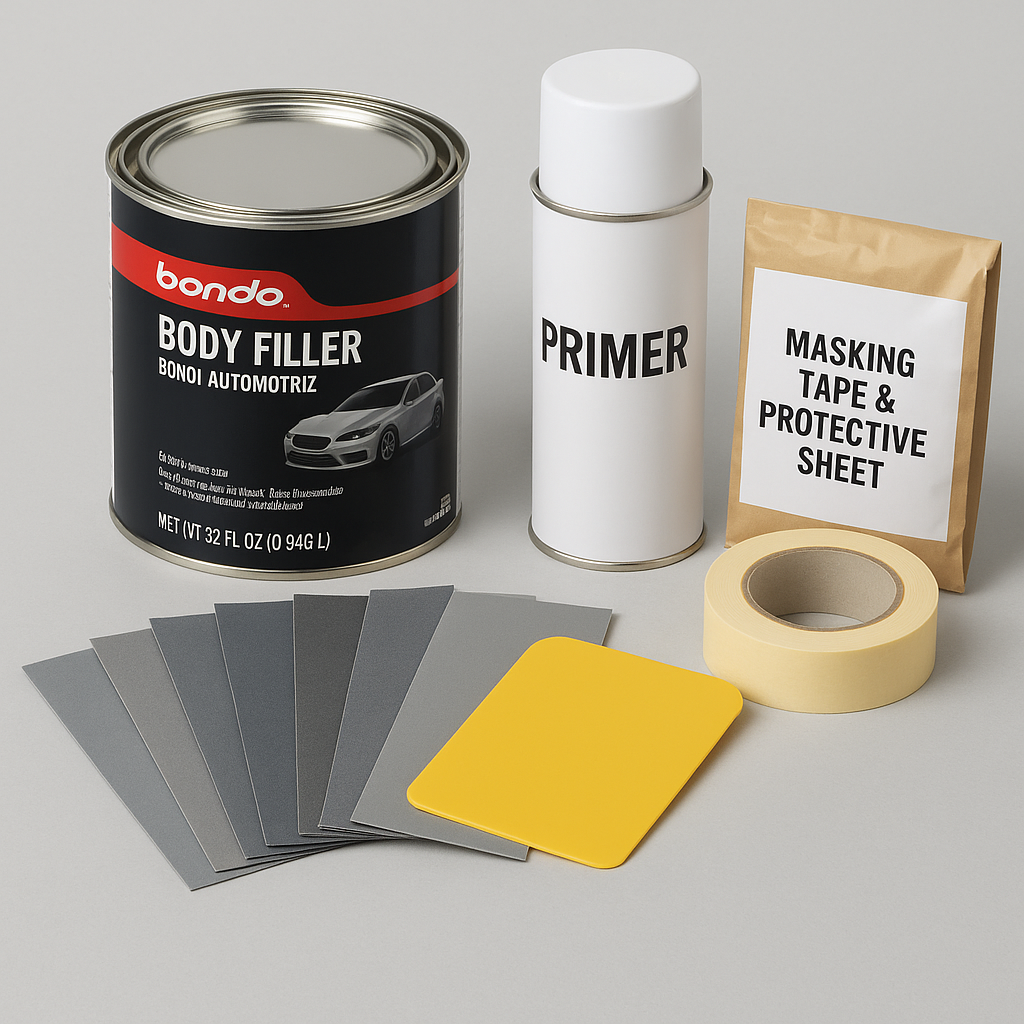
A car body repair kit is a collection of tools and materials designed to fix minor dents, dings, scratches, and paint imperfections. These kits typically include:
- Body filler (like Bondo)
- Sandpaper (various grits)
- Putty knife or spreader
- Primer
- Touch-up paint
- Masking tape and protective sheets
- Application tools
Some advanced kits may also include dent pullers, heat guns, or fiberglass repair components.
Why Use a Body Repair Kit?
Using a car body repair kit has several benefits:
- Cost-effective: Avoid expensive trips to the auto body shop.
- Convenient: Perform repairs at home at your own pace.
- Preserve resale value: A well-maintained body increases trade-in or resale value.
- Learn a new skill: DIY car care is satisfying and empowering.
Step-by-Step Guide to Using a Body Repair Kit
Step 1: Identify and Clean the Damaged Area
Start by examining the damage. Is it a dent, a paint chip, or a deep scratch?
- Wash the area with car soap and water.
- Dry it completely.
- Use rubbing alcohol or wax remover to eliminate grease or residue.
Pro Tip: A clean surface ensures better adhesion of fillers and paint.
Step 2: Sand the Surface
Use coarse-grit sandpaper (e.g., 80-grit) to roughen the area. This removes paint and rust while allowing the filler to stick properly.
- Feather the edges around the damage.
- Clean away the sanding dust with a microfiber cloth.
Step 3: Apply the Body Filler
Mix the body filler according to the instructions provided in the kit. Use a plastic spreader to apply the filler over the damaged area.
- Spread in thin layers.
- Allow it to dry completely (usually 15–30 minutes).
Important: Work quickly—most fillers harden fast!
Step 4: Sand and Shape the Filler
Once the filler has cured, sand it using medium-grit sandpaper (e.g., 180-grit) followed by a finer grit (e.g., 320-grit) to smooth the surface.
- Check for evenness by running your hand over the surface.
- Reapply filler if needed for deep areas.
Step 5: Prime the Repaired Area
After smoothing the surface:
- Mask the surrounding area with tape and protective sheets.
- Apply a quality primer spray in light, even coats.
- Let each coat dry for 10–15 minutes before the next.
Bonus Tip: Sand lightly with 600-grit sandpaper between coats for a smooth finish.
Step 6: Paint and Finish
Once the primer is dry:
- Apply touch-up paint that matches your car’s factory color code.
- Use multiple thin coats rather than a single thick one.
- Finish with a clear coat if included in your kit.
Allow the paint to cure for 24–48 hours before washing or waxing.
Additional Tips for Professional Results
- Work in a well-ventilated, dust-free environment.
- Wear gloves and a mask when handling chemicals and sanding.
- Use heat lamps or a hair dryer to accelerate curing (optional).
- Match your paint code carefully—usually found inside the driver’s door jamb.
When to Seek Professional Help
While body repair kits are excellent for minor cosmetic repairs, you should consult a professional for:
- Structural damage or frame issues
- Deep or large dents
- Advanced rust or corrosion
- Airbag deployment areas
Conclusion
Mastering the use of a car body repair kit can save you money and help you maintain your vehicle’s sleek appearance. With the right tools, a bit of patience, and some practice, even beginners can achieve professional-looking results.
Whether you’re fixing a scratch from a runaway shopping cart or a small dent from a parking lot mishap, investing in a quality auto body repair kit is a smart move for any car owner.